📖 Using FileZilla
Using FileZilla to Upload Files
Uploading your site to the student web server is a key step in publishing your work online. This guide shows how to use FileZilla, a free FTP client, to connect and transfer files to your server space at https://mywebtraining.net/webdev/username/.
What Is FileZilla
FileZilla is a widely used FTP (File Transfer Protocol) application that lets you connect to a remote server and upload files directly from your computer. It is free, open source, and available for all major operating systems.
Downloading FileZilla
- Visit filezilla-project.org and download the FileZilla Client for your operating system.
- Choose a version without bundled software to avoid security issues.
- Run the installer and follow the instructions to complete installation.
- Need help? Use the official FileZilla Installation Guide.
Connecting to the Student Server
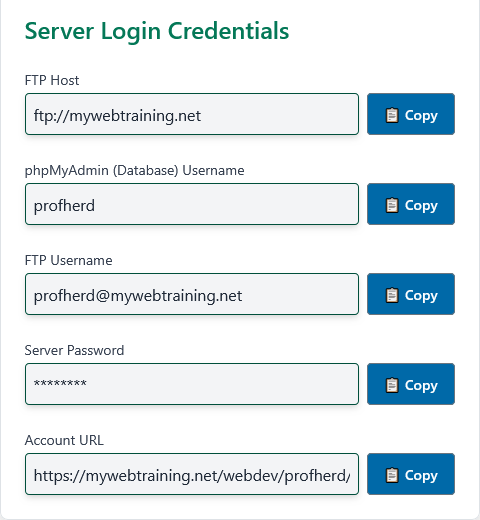
Credentials
Once FileZilla is installed, open the program and fill in the Quickconnect fields. Student account credentials are unique for each account and will be provided by your instructor. Once the credentials have been created, students can access them from their profile edit view at mywebtraining.net site.
- Host
ftp://mywebtraining.net- Username
- Your registered username followed by the domain
username@mywebtraining.net - Password
- The FTP password assigned with your server account
- Port
21
Login
Copy your FTP login credentials from your profile edit view at mywebtraining.net and paste into the FileZilla server credential fields as shown. Click Quickconnect to log in.

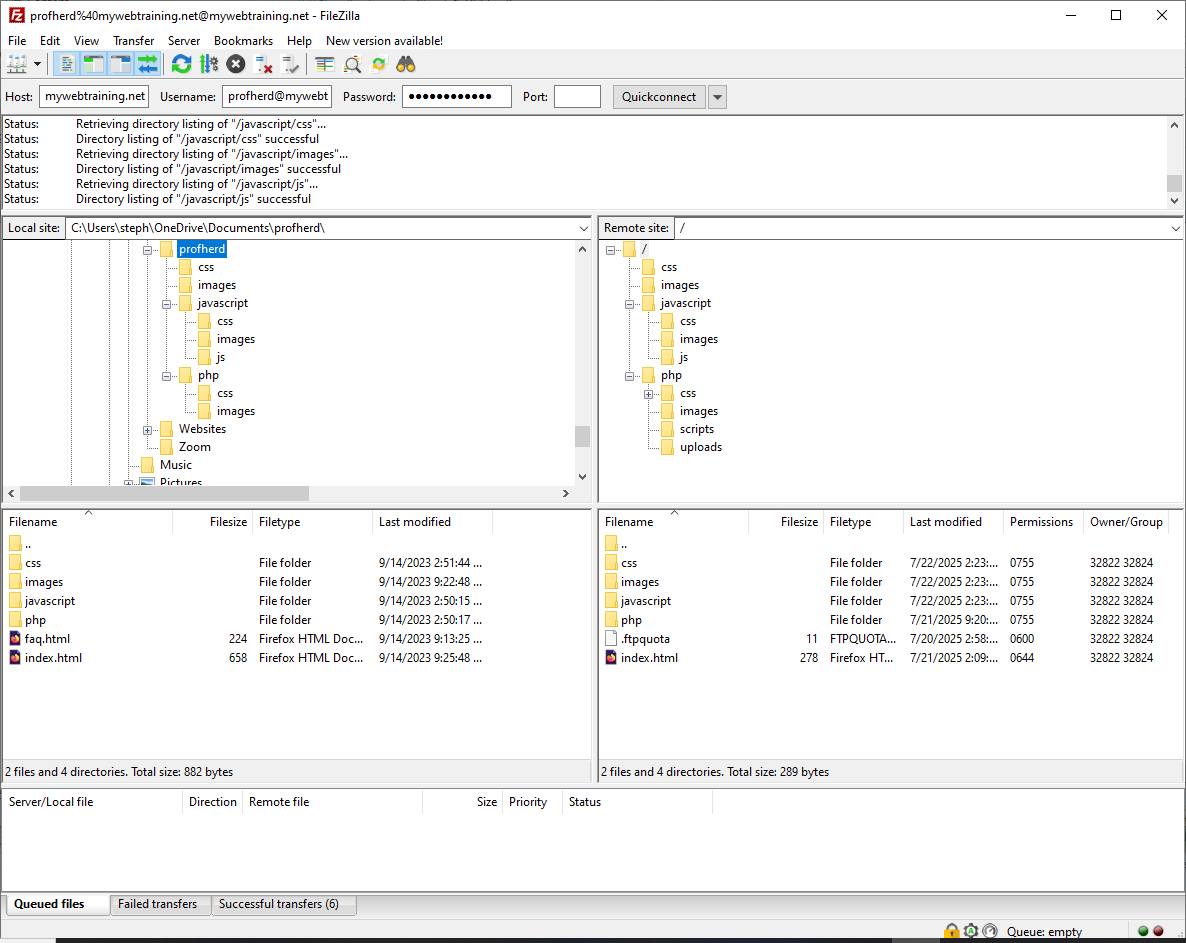
Uploading Files
When connected, FileZilla displays two main panels:
Local Site(left)- Shows files on your computer
Remote Site(right)- Shows your personal folder on the student server
- Select the file(s) you want to upload from the left panel.
- Drag and drop them into the right panel.
- Your files will appear in your remote folder.
Future Use
- Open FileZilla
- Select your saved connection from the Quickconnect dropdown
- Upload updated or new files
- Visit
https://mywebtraining.net/webdev/username/to view your site
Important Notes
- Upload all files: HTML, CSS, JavaScript, PHP, images, etc.
- Maintain your local folder structure on the server
- Test your pages after uploading
- Remember: the server is case-sensitive. Use exact casing for filenames and URLs
Additional Resources
Last updated: July 26, 2025 at 6:03 PM